(516) 535-6728
Shop
Book Now
About
About
About
Menu of Services
Deep Blue Med Spas
New York Plastic Surgical Group
Policies
New Patient Forms
Financing
Our Team
Our Team
Directors
Physician Assistants & Nurse Practitioners
Medical Aestheticians
Medical Assistants
Beauty News
Beauty News
Blog
News Room
Services
BOTOX®, Injectables & Threads
BOTOX & Wrinkle Relaxers
BOTOX® Cosmetic
Daxxify™
Dysport®
Fillers
Juvederm Family of Fillers
Restylane
Radiesse®
Sculptra® Aesthetic
KYBELLA®
hidden child
RHA Fillers
hidden child
Thread Lift
hidden child
Treatments
Cheekbone Contouring
Chin Augmentation
Jawline Enhancement
Lip Augmentation
Lip Flip
Nasolabial Folds Treatment
Non-Surgical Rhinoplasty
Under Eye (Tear Trough ) Treatment
Laser & Skin Rejuvenation Treatments
Laser Treatments
AviClear®
BBL HEROic + Moxi
Clear + Brilliant® Laser Skin Rejuvenation
CO2 Laser Resurfacing
CoolPeel®
Fraxel® Fractional Laser Resurfacing
Laser Genesis by Cutera
IPL & Photo Rejuvenation
Skin Tightening
Morpheus8 Microneedling
Ultherapy® Skin Tightening
Body Treatments
Cellulite Treatments
Sculptra® Butt Lift & Augmentation
VelaShape™
Avéli™ Cellulite Treatment
Laser Hair Reduction
hidden child
Non-Surgical Body Contouring
CoolSculpting® Elite
CoolTone™
Sculptra® Aesthetic
Tattoo Services
Nipple Tattooing
Tattoo Removal
Services For Men
Services for Men
BROtox
Facials
Laser Hair Reduction
Non-Surgical Body Contouring
Skincare
Tattoo Removal
Facials & Skincare Plus
Facials and Skincare Plus
BioRePeel
Bridal Beauty Plan
Chemical Peels
Dermaplaning
Diamondglow™
Eyebrows
Facials
Glo2Facial
Glowpin™
Hydrafacial®
Microdermabrasion
Microneedling
Pain Management
PRO-NOX™ Pain Management System
Pregnancy Safe Treatments
Scalp and Hair Health
Skin Care Products
Acne Treatments
ZO Skin Health®
TAMA Microcurrent
VISIA® Complexion Analysis
Shop
Conditions Treated
Acne & Acne Scarring
Age Spots
Cellulite
Dark Spots
Double Chin
Fat Reduction / Body Contouring
Fine Lines & Wrinkles
Non-Surgical Facelift
Rosacea
Sagging Skin
Scalp & Hair Health
Scar Reduction
Signs of Aging
Spider Veins
Tattoo Removal
Under-Eye Circles
Unwanted Hair
Weight Management & Regenerative Medicine
Wellness Connection Program
Intramuscular Injections
IV Infusion Therapy
Vitamins & Supplements
Before & After Gallery
Events & Specials
Locations
Contact
Home
Gallery
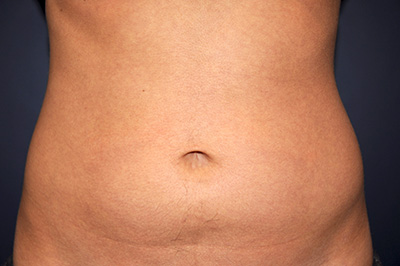
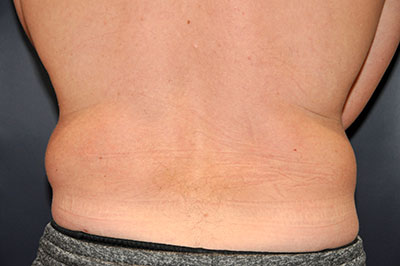
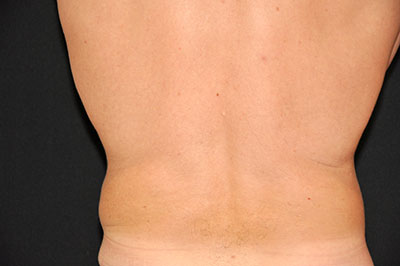
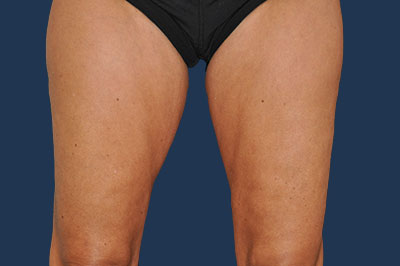
CoolSculpting
Before & After Gallery
Back to Gallery
Provider
Lauren Montemayor MS PA-C
Kaylin Salubro NP-C
Melissa Colletti-White PA-C
Marianna Torre PA-C
Tiffany Cheung MS PA-C
Bobby Mathews MPAS PA-C
Innessa Mandelbaum
Szilvia Sadowski
Ashleigh McCabe
Stacyann Samaroo
Alexandria DeFeo
Christina Mavroudis
Nicole Schwarz
Fiona Fortunato
Alyssa Levine
Jacqueline Valet
Cat Lopresti
Nargiza Smith
Filter
Reset
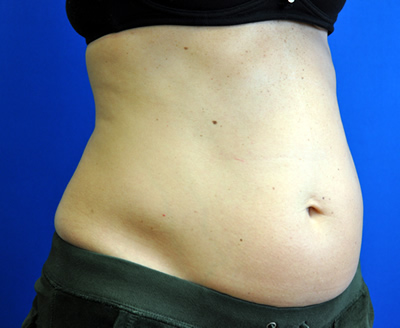
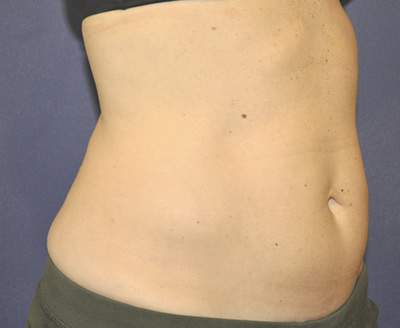
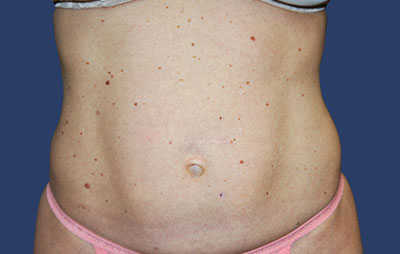
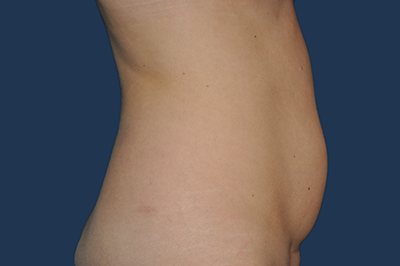
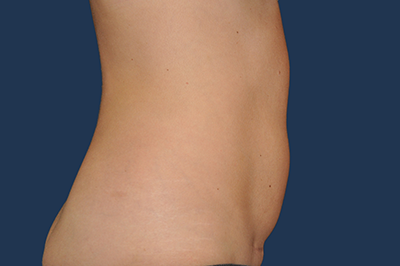
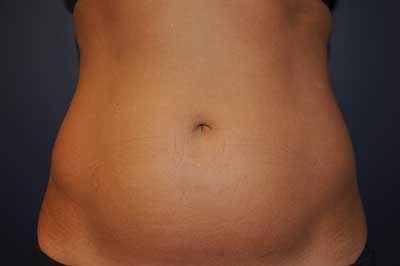
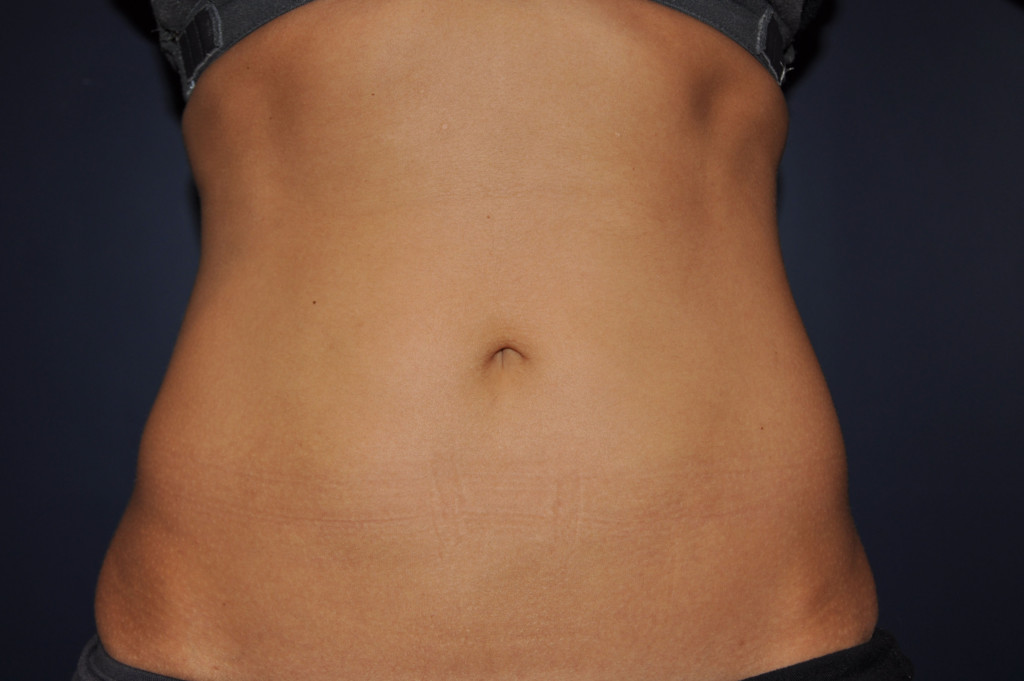
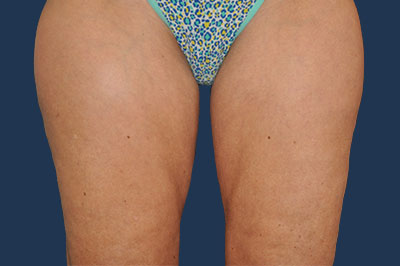
CoolSculpting Patient 1
View Case
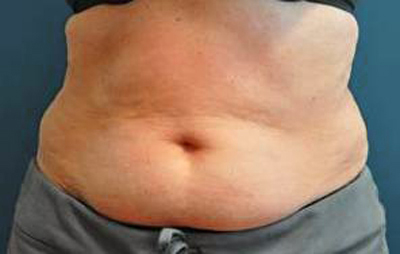
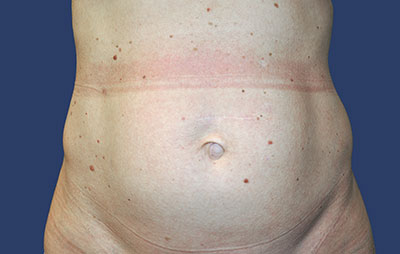
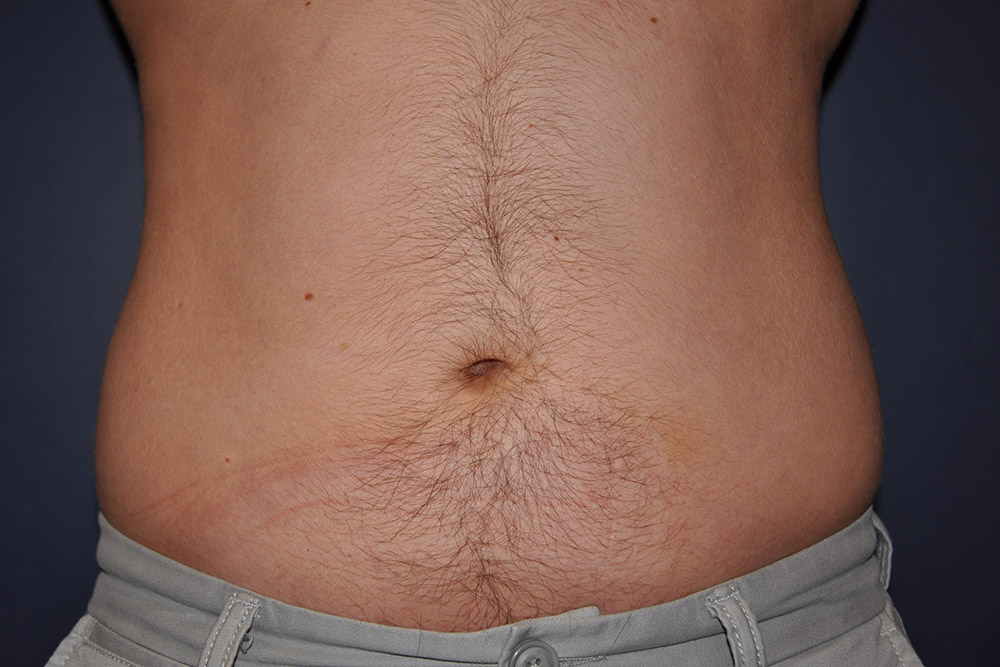
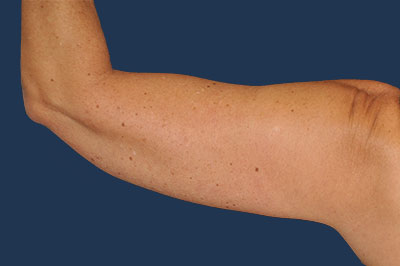
CoolSculpting Patient 2
View Case
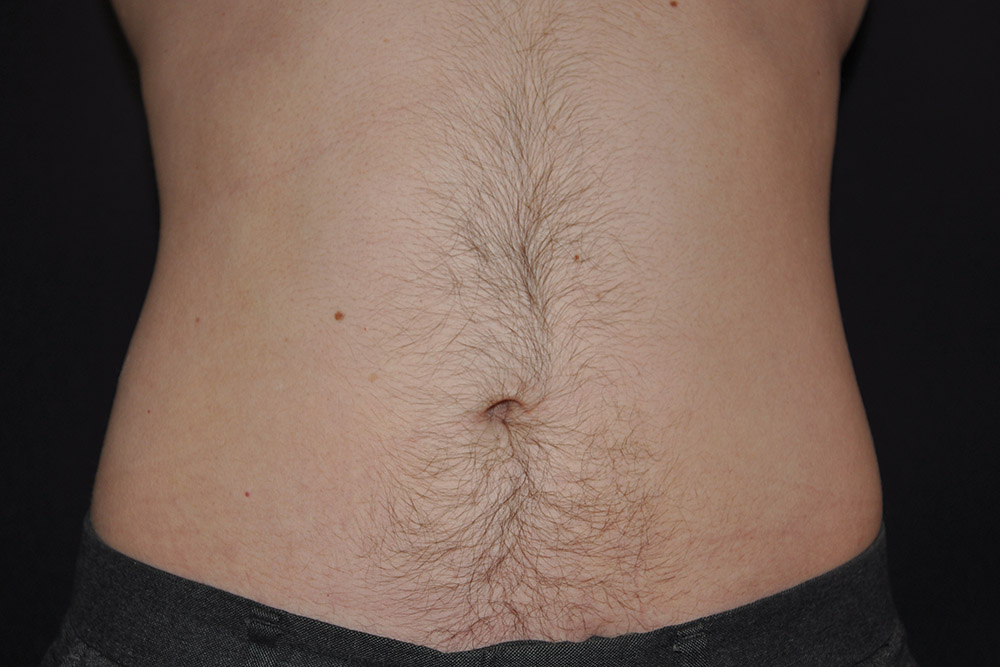
CoolSculpting Patient 3
View Case
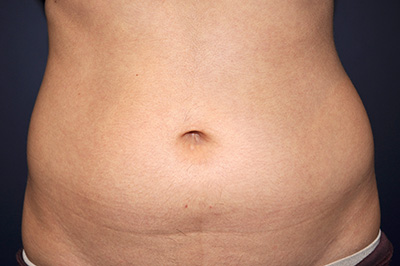
CoolSculpting Patient 4
View Case
CoolSculpting Patient 5
View Case
CoolSculpting Patient 6
View Case
CoolSculpting Patient 7
View Case
CoolSculpting Patient 8
View Case
CoolSculpting Patient 9
View Case
CoolSculpting Patient 10
View Case
Prev
❮
1
2
3
❯
Next